Here’s a step-by-step guide on how to build a foldable candy wall….by far one of my most popular projects!
*This post contains affiliate links, and I may receive a small commission at no extra cost to you if you make a purchase through them.
Materials:
8x Machine Screws & Wing Nuts (I used these instead of the provided screws with the dispenser so that I could easily remove the dispensers and fold the wall when not in use.
3 x 4-inch hinges (used to fold down the wall)
8 x 2-inch hinges (used to fold in the small shelves and the legs)
Paint (I used white that I had on hand)
4’x8′ 3/4″ piece of plywood (I used birch plywood)
2 pieces of 1x3x8 piece of scrap wood to be used as supports & braces
Tools:
Jigsaw (to cut the curved part. Could also be used to cut the wall in half, and for the legs)
Mini-circular saw (I used this to cut the wall in half, and to cut the triangular legs, and the pieces for the braces)
Steps:
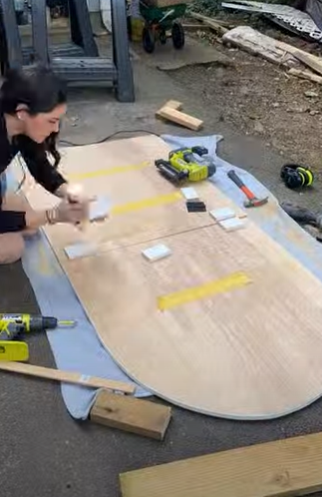
- Cut down the 3/4″ plywood to 3’x6′ (my local hardware store did this for me!)
- Draw an arch at the top and cut using a jig saw. I used a string, screw, and pencil.

- Sand all edges smooth.
- Prime
- Paint
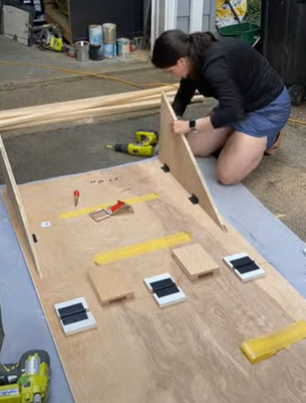
- Cut the board across into two pieces…I didn’t do halfway because I didn’t want the top portion to hit the ground when it’s folded over. So I’d say cut it so that the top arch part is 33″ tall and the bottom rectangle portion is 39″.
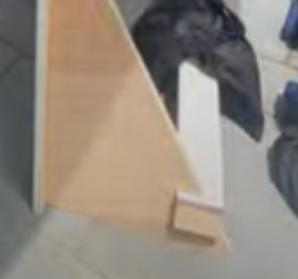
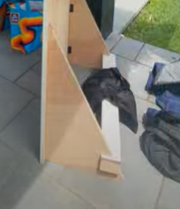
- Use the extra plywood to cut two right triangle legs, mine were about 24″x36″. I also cut one “notch” into each piece so that a 1×3 support can fit across (the sandbag will sit on this to help with stabilization).
- With your two candy wall pieces lying face down, leave a small gap between them to ensure they can fold towards each other without interference.
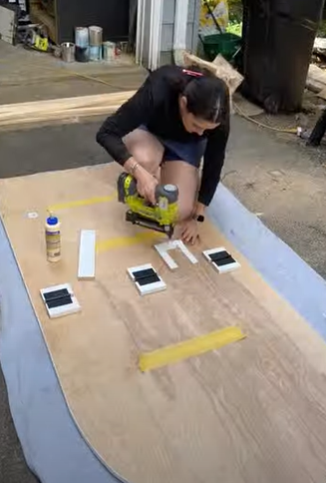
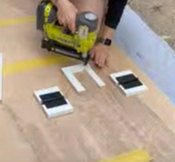
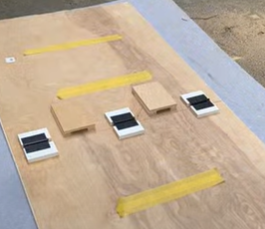
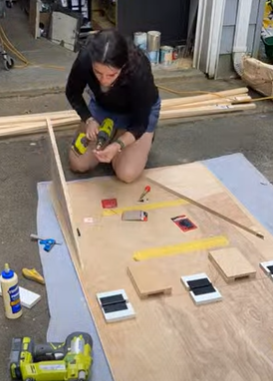
- Cut 6 pieces from your 1×3 that are slightly larger than your 4″ hinge. These pieces will be glued and nailed to the back of the candy wall exactly where your hinges will go. They provide more material for the hinge screws to be drilled into. 1-1/2″ vs only 3/4″.
- Glue and screw the six 1×3 pieces where each hinge will be placed (I did 3 across the back).
- Attach the hinges to these 1×3 pieces. Ensure that the screws they provided are not too long. If they are, use 1-1/4″ screws. *Make sure the hinges are installed so that the top arched piece folds downward/backwards. Good side facing out/up.
- Create 3 “pockets” using scrap wood (I used a combo of 1×3 and leftover plywood). Two pockets will be used to hold a support piece in between the 4-inch hinges, and one pocket will be at the top to hold the neon sign cord & power bank. Use wood glue and nails to attach. *Ensure that your upper pocket fits your power bank, and your lower pockets fit a 1×3, with a little wiggle room.

- Attach each triangular leg to the back of the candy wall with two 2-inch hinges. I attached them about an inch in from the edge. Again, make sure the screws aren’t too long. If so, use 3/4″ screws. *Make sure the hinges are installed so that the legs fold inward.
- Stand your candy wall up. Cut two pieces of 1×3 about 10-12 inches each and place each support piece into the pockets on the back. This will prevent the top portion from folding over!
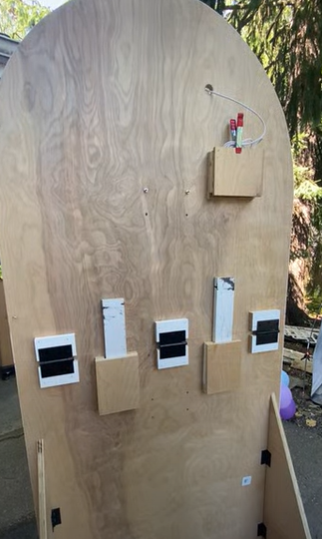
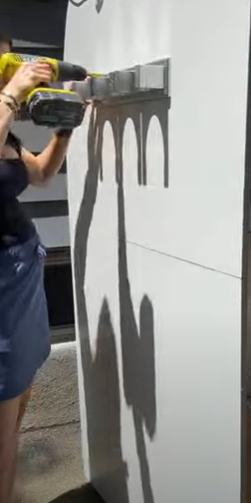
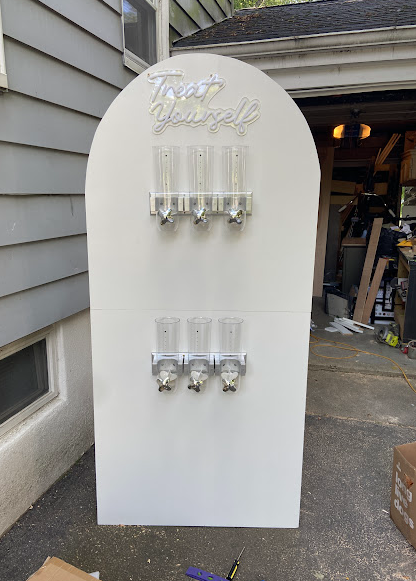
- Attach one dispenser to the upper part, and one dispenser to the lower part. I left enough space for there to be a shelf & cup under each, to collect any loose candy. **I did not use the screws that came with the dispenser because I wanted my dispensers to be removable. So, I drilled a hole straight through my wall, and used the machine screws and wing nuts to attach the dispensers.
- Attach “Treat Yourself” neon sign. I drilled a hole through my board large enough to get the cord through. I tried to do it in a spot that wasn’t too obvious.
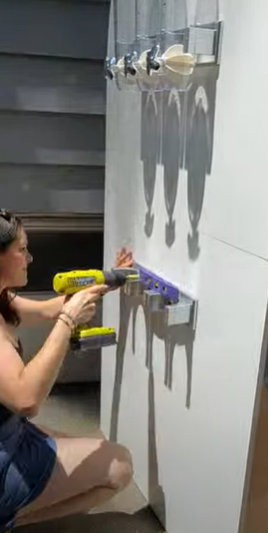
- Cut the 1×3 down to make two shelves and attach them to hinges below each dispenser to catch any loose candy that spills. *Ensure hinges allow the shelves to fold upwards.
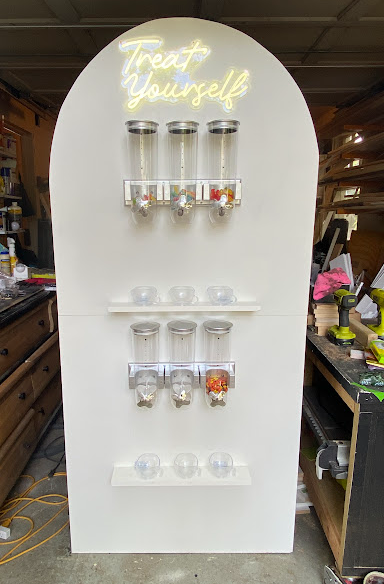
- I installed some peel & stick velcro to hold a container that will hold plastic bags for people to put the candy into.
- Fill a sandbag with sand and place it on top of the 1×3 support that spans between the two triangle legs.
- ENJOY!!