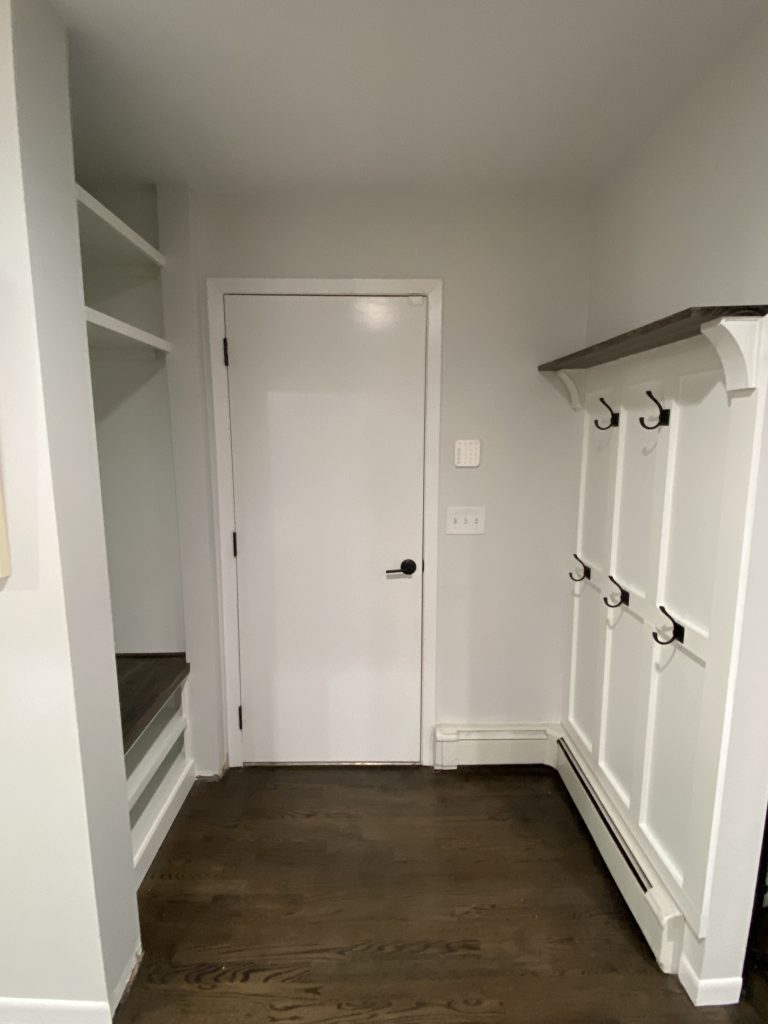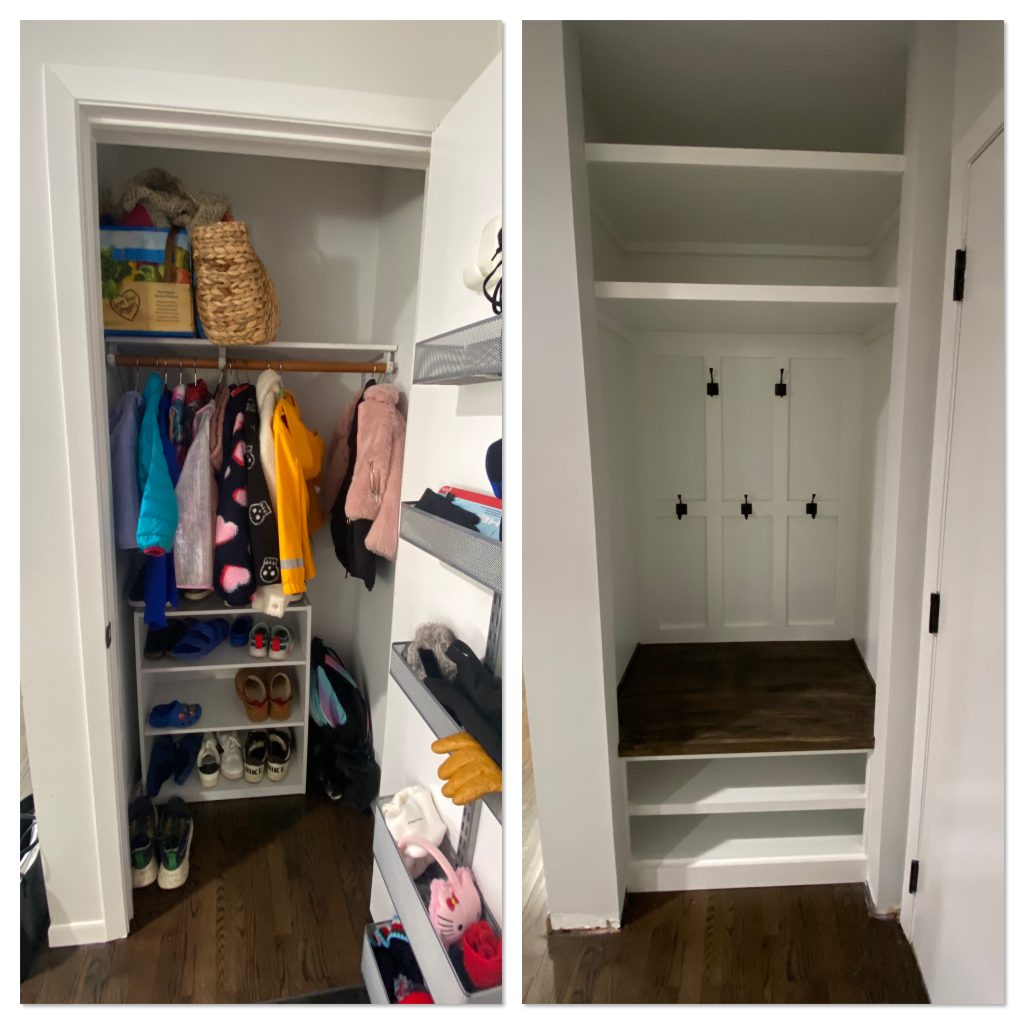
This coat closet was destined to be a more *elegant* drop zone!
This post contains affiliate links, which means I may earn a small commission at no extra cost to you if you make a purchase through my links. Thank you for your support!
Materials/Supplies:
2x 3/4″ sande plywood for bench and shelves
1x2x8 primed pine for shelf cleats and face frames
1x3x8 primed pine used for board and batten
1x4x8 primed pine used as baseboard and for board and batten
1x8x8 select pine board for shelf
18-gauge brad and 23-gauge pin nails, assorted sizes
pocket hole screws (assorted sizes)
sandpaper (assorted grits)
Sherwin Williams Emerald Urethane Trim Paint in Pure White satin
Water Based Wood stain in “True Black” (though it’s more like Kona or Ebony)
Tools:
7-1/4″ sliding compound miter saw
stud finder (the only one I trust!)
The first thing I did was cut down my plywood using my mini circular saw and a straight edge. I also bought a 2″ insulation foam board (4’x8′) to put on the floor so that I could cut the plywood right on top of it! This made it so much easier to safely cut down the plywood. Then, I assembled the “cabinet”/bench portion (without a back) using pocket holes and wood glue, including a shelf in the middle. I actually ended up disassembling it because it wouldn’t fit in the space! The opening to the closet was about 6″ shorter than the actual interior of the closet, so I decided to reassemble the pieces in place, and left 3/4” space in front to fit the face frame. The face frame was made by 1×2’s and not only covered the plywood edges, but helped to make the shelves appear thicker!
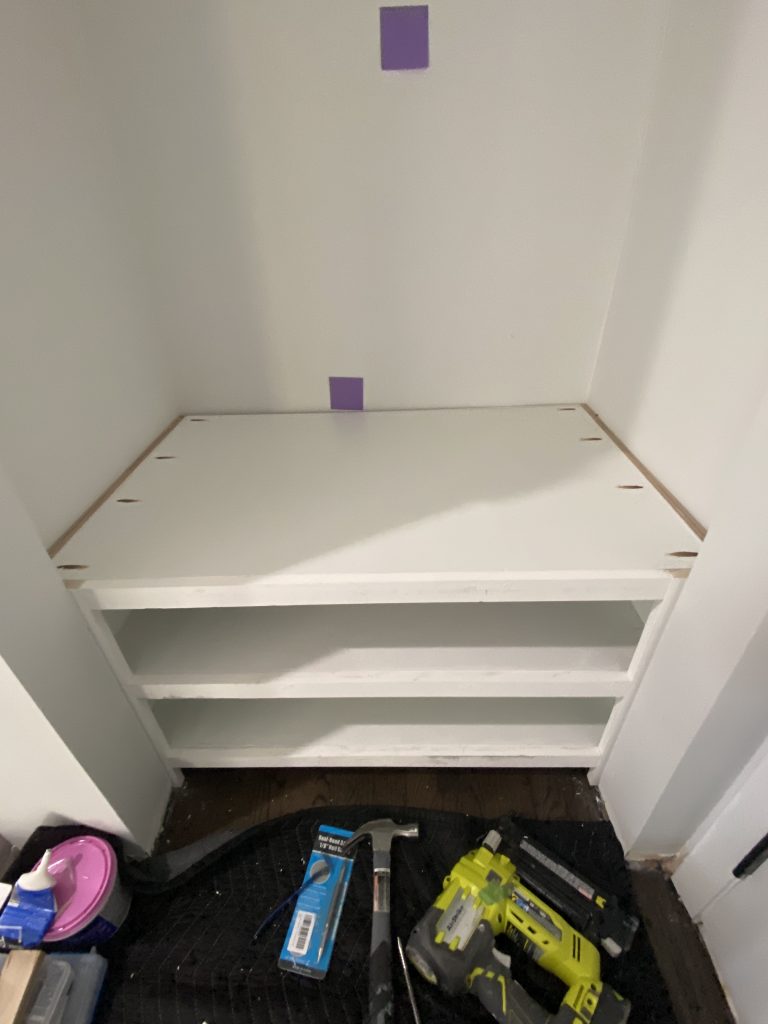
Then it was time to install the bench top! Walls/closets are rarely square, so I took measurements at the back, middle, and front, and then attached it using brad nails. It would have been easier to stain before install, so next time, I think I would do that! I finished the bench top by installing a 1×2 in the front as well (stained), and small 3/8″ square dowels on the sides where it met the wall, to hide the small gaps. While the stain had built-in poly, I did put another 2 layers of poly on for added protection!
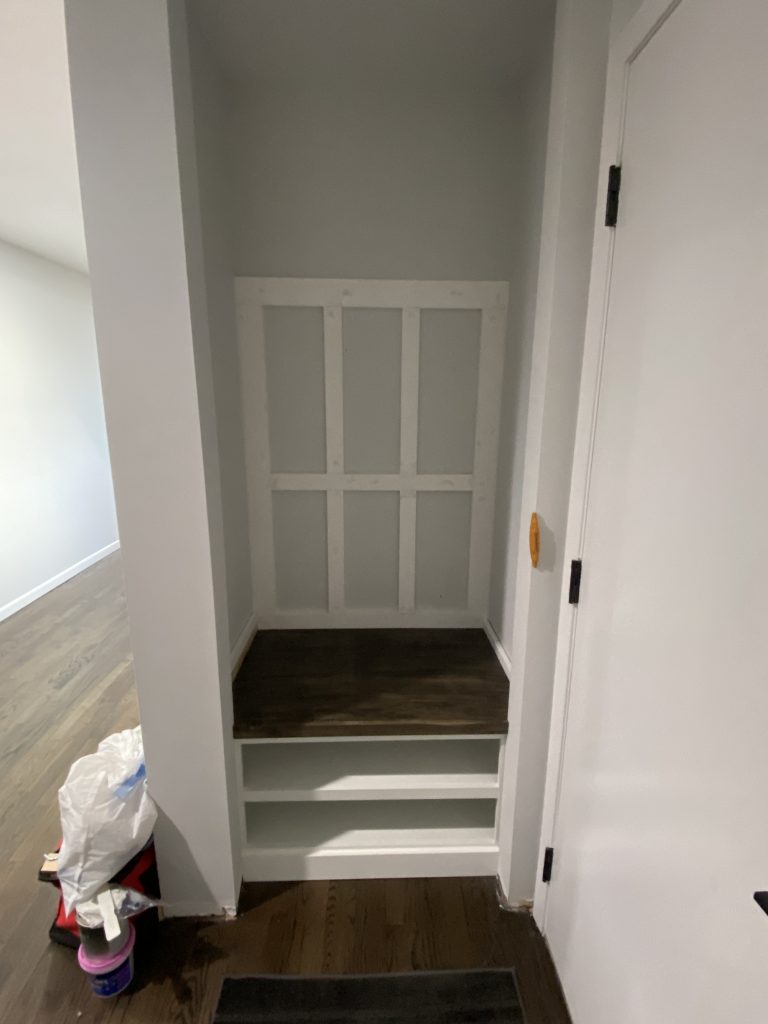
Once the bench portion was done, I focused on the board and batten accent wall. I used 1×4’s for the top and sides, and 1×3’s for the rest, attaching them with 1-1/4″ brad nails shot in at alternate angles. The board that would eventually hold the hooks, also got screwed into the studs using 2-1/2″ construction screws. After all of the board were attached, I caulked all of the edges and wood filled the small holes. While that dried, I moved on to the upper portion and installed two shelves. I used 1×2’s as cleats and screwed them into the studs. I also used toggle bolts on the pieces that didn’t hit a stud. The shelf was made from 3/4″ plywood, cut to size, and it rested on the cleats on 3 sides. 1×2 face frames were also installed to hide the plywood edge and to make the shelves appear thicker. I wood filled the holes, and caulked all the seams too.
When everything was dried, I primed the shelves with primer, and then gave everything 2 coats of white paint. Lastly, I installed the black coat hooks, using toggle bolts on the ones whose board did not hit studs.

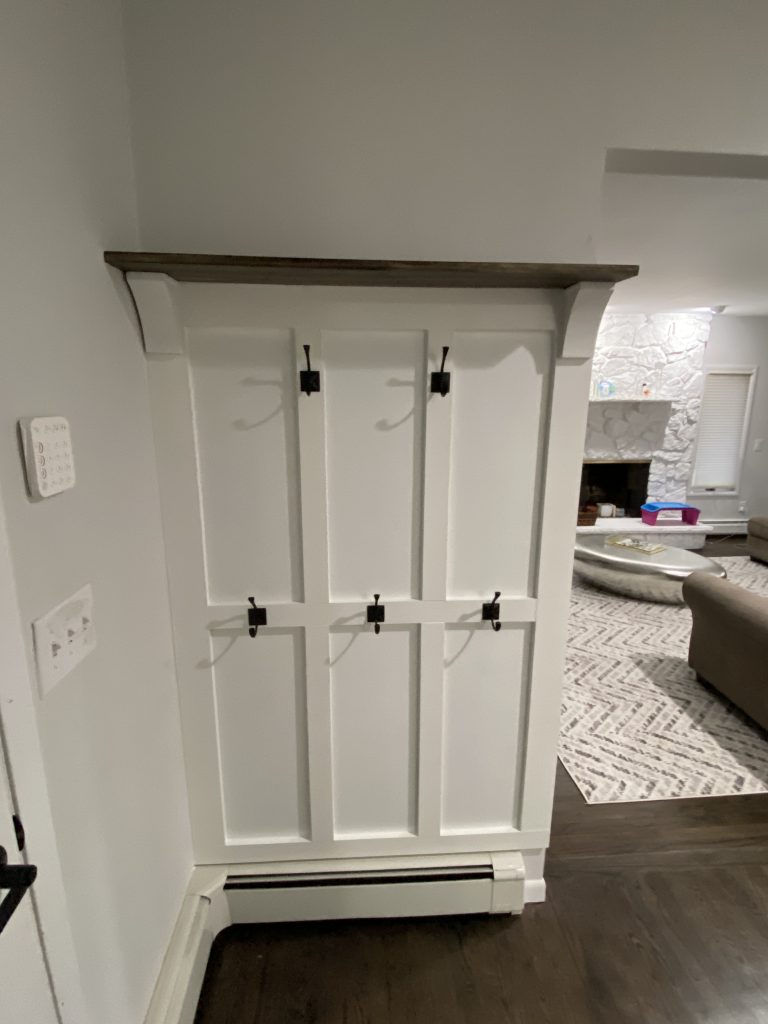
The wall opposite this coat closet also got the board and batten treatment! The only difference was that I placed two corbels and a shelf on top. The corbels were painted white to blend in, and the shelf was stained to match the bench!
Now, there is an organized, elegant space to hang your coat and store your shoes when you walk in from the garage!